


In this small Unity particle system tutorial i want to show you how to create a circle with the shuriken particle system in Unity.
It doesn’t require any coding and can be used later on anything you like, also it is slightly flexible for other forms like helix. I’m using Unity 5 for this but it should also work in version below.
If you want to learn how to use code to create circles: Unity Particle System Tutorial: Circles with Code
1.) Create a Unity Particle System and change the settings as seen in the image below.
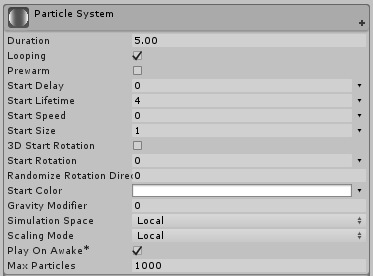
Lifetime will represent the radius of the circle, so smaller Lifetime = smaller circle.
Speed is at 0 since we will drive the particles by velocity over lifetime.
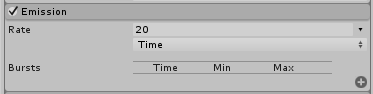
2.) Set the emission rate to your liking i use 20 here.
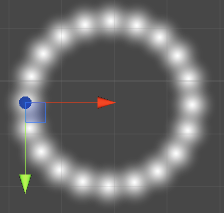
3.) Set the Shape to Box and set all Coordinates to 0
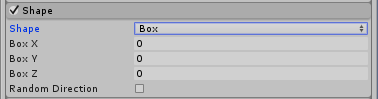
You can change that later on, but now it’s better for the accuracy of the curves we will create over the next steps.
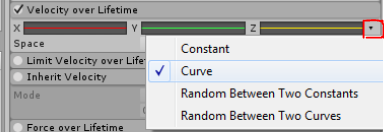
4.) Now comes the funny part the velocity over lifetime. So activate that. Change the velocity type from constant to Curves.
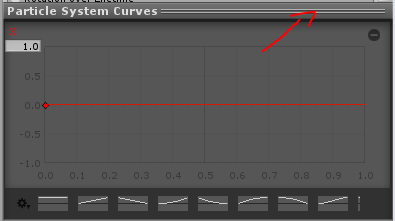
5.) Now we create the curve for the X Axis. So click on it and if you see the preview in the bottom of the curve, make sure you right click the upper border of it for a bigger view.
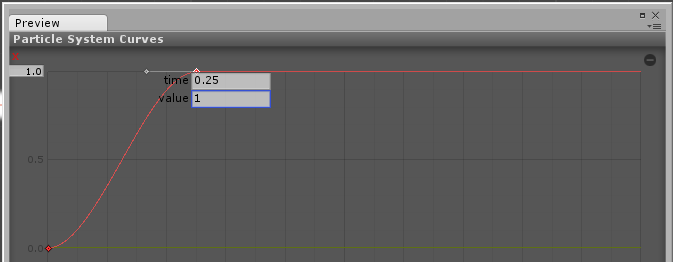
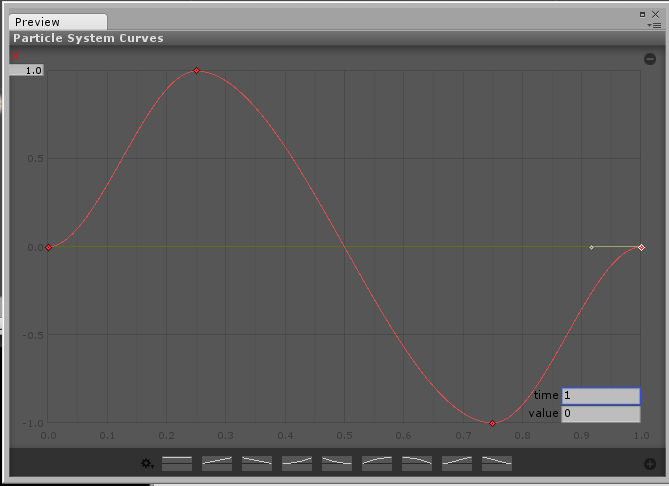
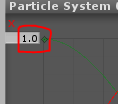
6.) Now we can be a bit more precise for all changes we make. We will create a Sinus(sin) curve on the X-Axis now. Right click on the red line and click on Add Key. Once created select and right click it again and choose Edit Key. Change the time = 0.25 and value = 1 as shown in the image.
Now we add another key as before and change the values to time = 0.75 and value = -1
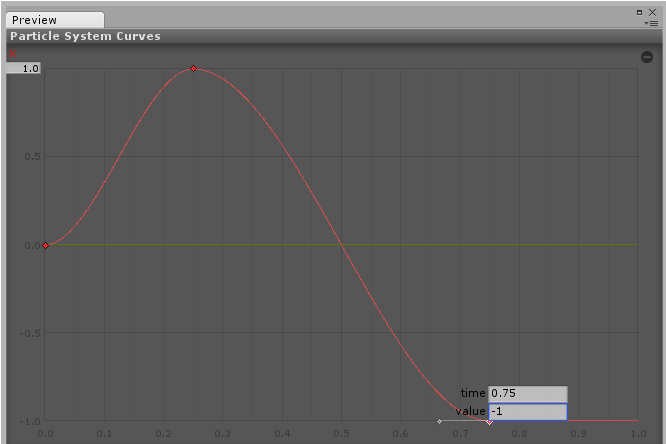
And now the last key needs to be set to time = 1 and value = 0.
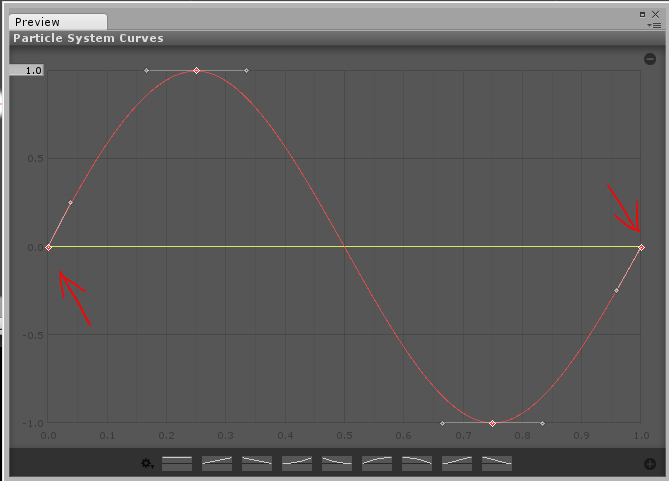
Final steps for the curves are changing the handle of the first and last key to the following. When it have to look like the following (ignore the yellow like).
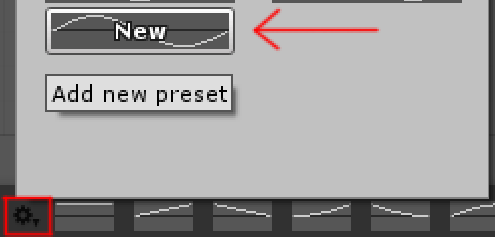
Now save that curve for later use as a preset.
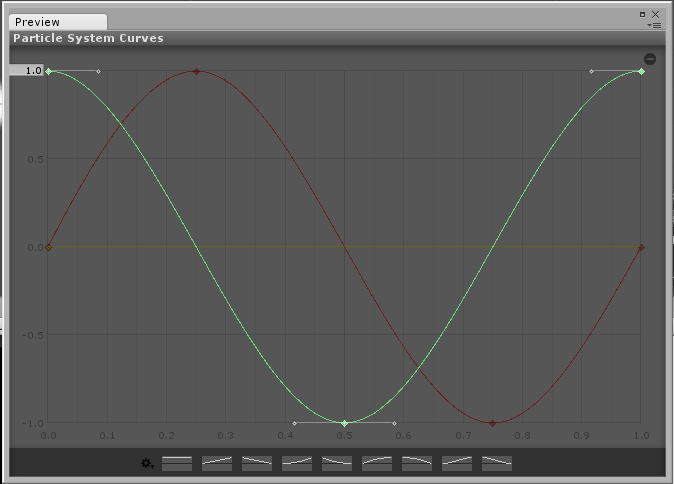
7.) Now we create a Cosine(cos) curve for the Y-Axis. Since you already know how this works i only willshow you the final result you should have.
The point values are:
Key 1: time = 0, value = 1
Key 2: time = 0.5, value = -1
Key 3: time = 1, value = 1
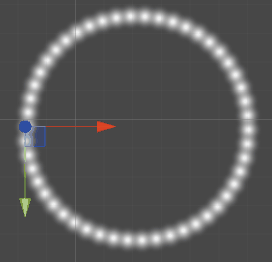
Now you have a circular particle system.
But it’s quiet slow, so what you can do is, to increase the height of the curves to for example 10.
But make sure you do that for both X-Axis and Y-Axis. This will also effect the radius, so reduce or increase the lifetime to your needs.
Thanks for reading my Unity Particle System Tutorial.
I hope it was helpful for you in any way. If so, share it to the world!
Please Rate below!